The day has finally come, and after quite a bit of hype and buildup, Windows 10 is now officially available. The update itself is on a staged rollout, which means it will be slowly becoming available to users over the coming weeks and months, so don't panic if you haven't already received an update notification. Besides, you have until July 29th, 2016 to download your free copy of Windows 10 if you're eligible, so there's plenty of time to get your ducks in a row.
On that note, there's been some confusion about who gets the update for free, what version folks will be getting, and what all needs to be done in preparation for the update. So if you're not 100% sure about all of this Windows 10 update stuff, I'll do my best to clarify everything below.
See if You Qualify for a Free Copy of Windows 10
One of the best things about Windows 10 is that it will be a free upgrade for most Windows 7 and Windows 8 users. To find out if you're eligible for a free copy of Windows 10, make sure to check out our full upgrade guide. To summarize, though, if you're currently running any standard, non-Enterprise edition of Windows 7 or 8, you'll be eligible for a free upgrade to either Windows 10 Home, or Windows 10 Pro.
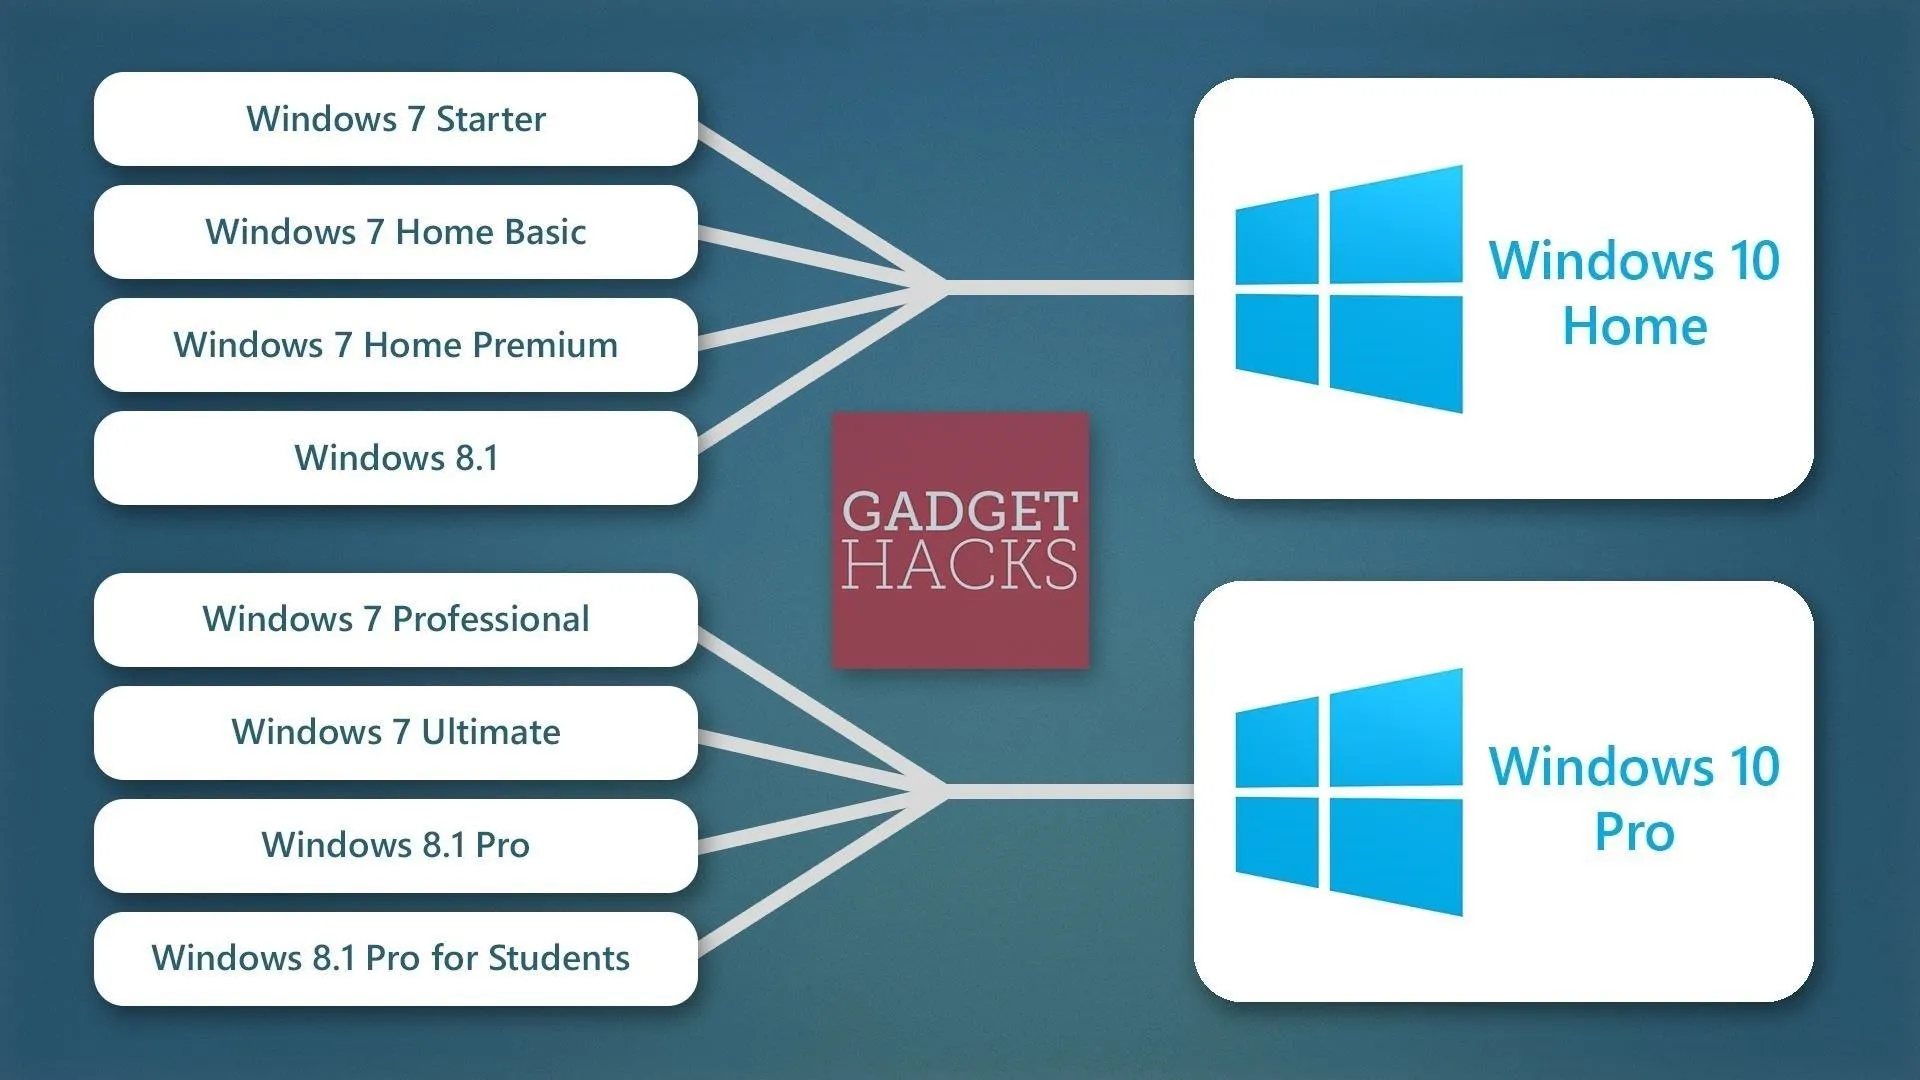
- Don't Miss: How Anyone Can Get Windows 10 for Free
Make Sure Your Computer Meets System Requirements
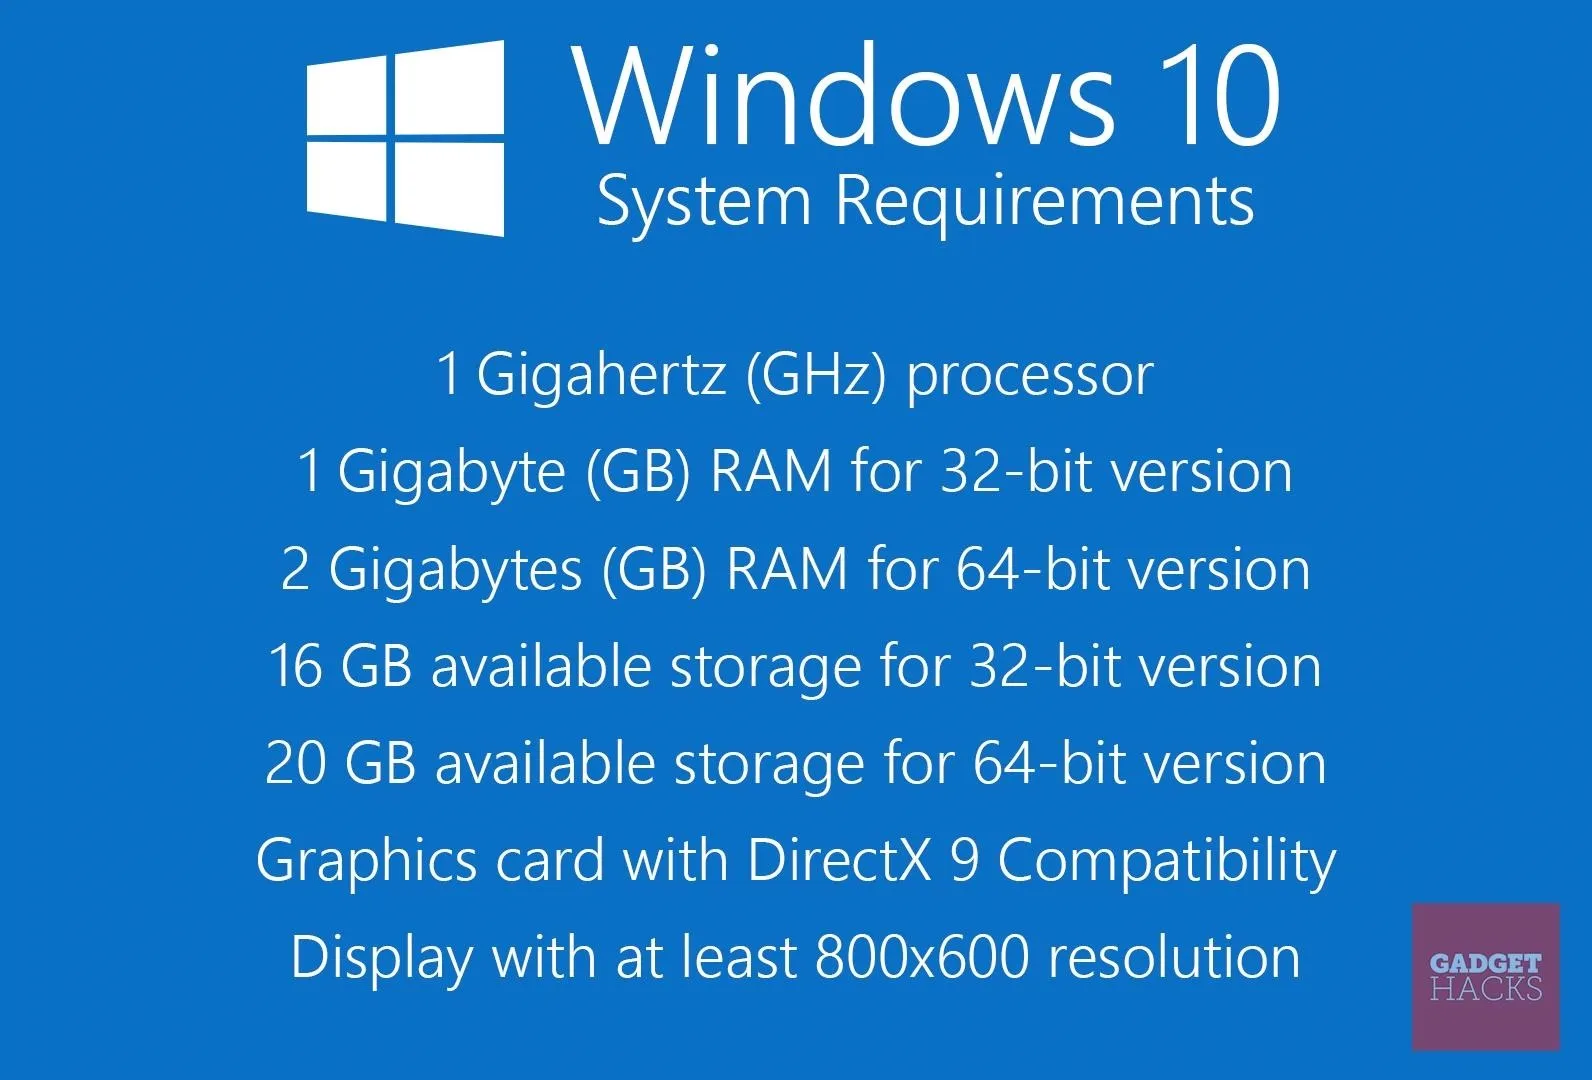
Microsoft has finally started to put aside its previous tactics of upping the system requirements for Windows with each iteration. As a result, Windows 10 has the same minimum system requirements as the last 2 versions, so if you're upgrading to Windows 10 from Windows 7 or 8, your computer should meet the requirements. To be on the safe side, though, have a look at the official Windows 10 system requirements below.
Free Up the Necessary Hard Drive Space
Windows 10 is a rather robust operating system, so it occupies a decent chunk of hard drive space in and of itself. If you're installing the 32-bit version of Windows 10, make sure you have at least 16 gigabytes of free storage space on your primary hard drive. 64-bit editions of Windows 10, on the other hand, require at least 20 gigabytes of free hard drive space.
To check the available space on your primary hard drive, open Windows Explorer and head to My Computer or This PC. From here, simply right-click the C:\ drive entry, then choose Properties. Your available space should be displayed on the popup that comes up next.
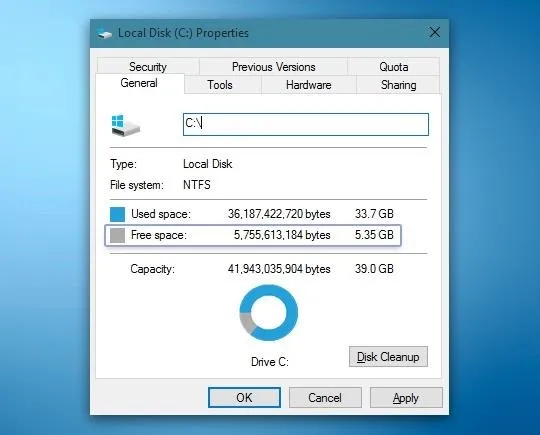
If you don't have enough hard drive space available, Faisal wrote an awesome guide on how to free up as much as 20 GB of space with a few simple clicks. The guide was written for Windows 10 users, but the process outlined in the article will be virtually identical on Windows 7 or 8.

- Don't Miss: How to Reclaim Up to 20 GB of Hard Drive Space
Make a System Image Backup Just in Case
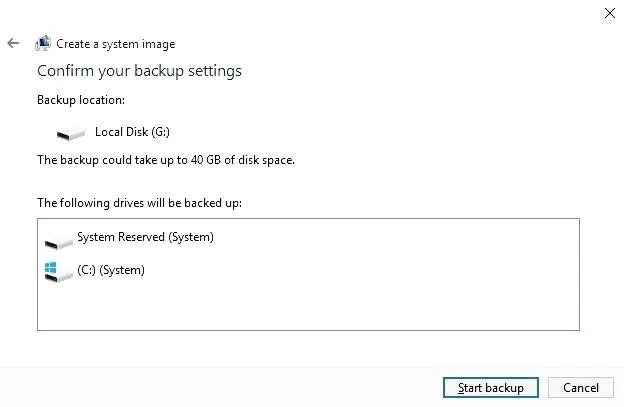
If your computer meets all of the above-listed requirements, you're just about ready to install the Windows 10 update. To be on the safe side, though, it would be a good idea to make a system image backup at this time. A system image backup is a snapshot of your computer's entire software, including app settings and data, so if anything goes wrong during the Windows 10 installation process, you'll be able to restore your previous Windows installation in its entirety.
Making a full system image backup is incredibly easy, and I've outlined the process in detail at this tutorial. Again, the tutorial was written from the perspective of a Windows 10 user, but the process should be identical on Windows 7 or 8.
- Don't Miss: How to Make a Full System Image Backup
Now that your PC has been properly prepared, you'll be able to install the free Windows 10 update without running into any hiccups. Though keep in mind that Microsoft has it on a staged rollout, so you may not get the update for a few more weeks. In the meantime, just sit back, relax, and keep an eye out for the Windows 10 update notification in your system tray, which should guide you through the update process when it arrives.











Comments
Be the first, drop a comment!