The Start menu has definitely seen many changes over the years—from the traditional menu that was present from Windows XP to 7, to the Start screen in Windows 8, to the hybrid of the two in Windows 10. And while the return of the Start "menu" has received near-universal praise, there are still some aspects old Windows 7 users will miss. Namely, the User folder and content folders (like Documents, Downloads, Music, Pictures, and Videos).
The good news is that there is no mysterious elements involved here. Microsoft has simply decided to hide these folders by default from the Start menu. Luckily, bringing them back is a breeze once you know where to look.
Go to the Start Settings
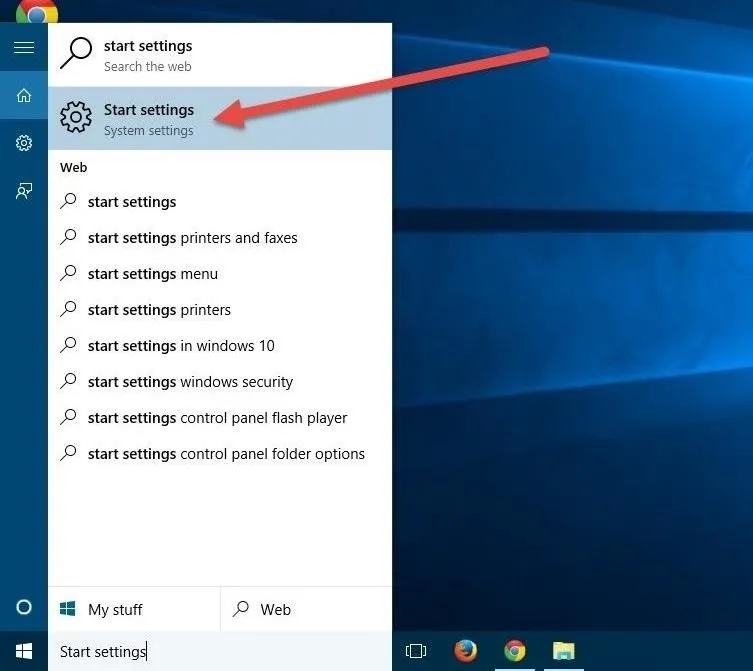
Click on the Start button and type in start settings to gain access to the Start menu settings.
Enable Folder Options
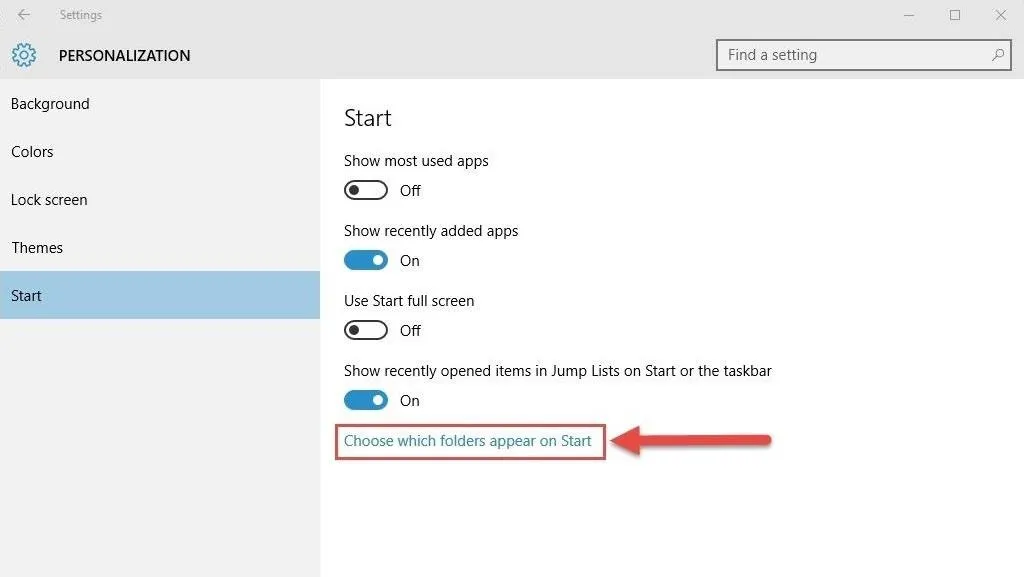
Inside the Start settings, you'll see a couple options for customizing the Start menu. To bring the folders back to the Start menu, you need to click on "Choose which folders appear on Start."
Add Back All the Folders You Want
Now you will see a screen with folder names and toggles. To bring back your User folder, simply enable the toggle for Personal folder. Naturally, you can also toggle on your content folders, including Documents, Downloads, Music, Pictures, and Videos.
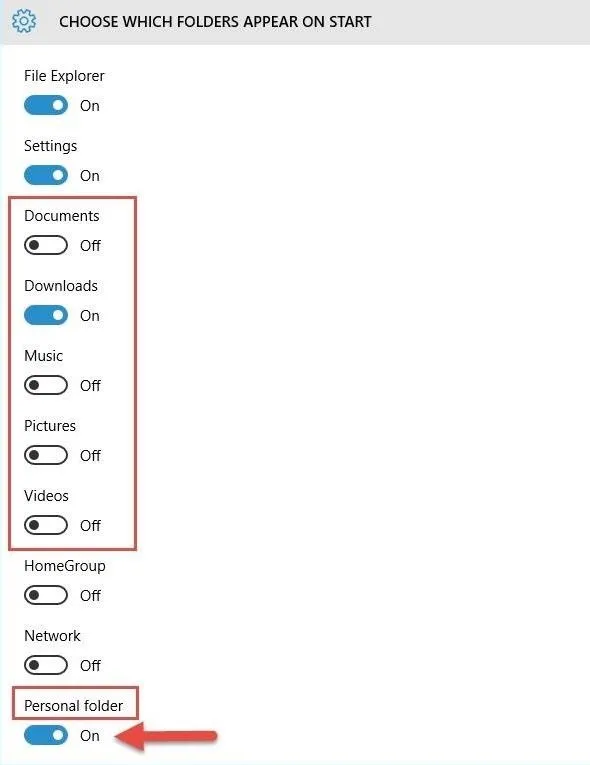
Furthermore, you can enable some other system folders here. Go ahead and customize as you desire, then simply click on the Start button and you should see your folders back on the Start menu on the left hand side.
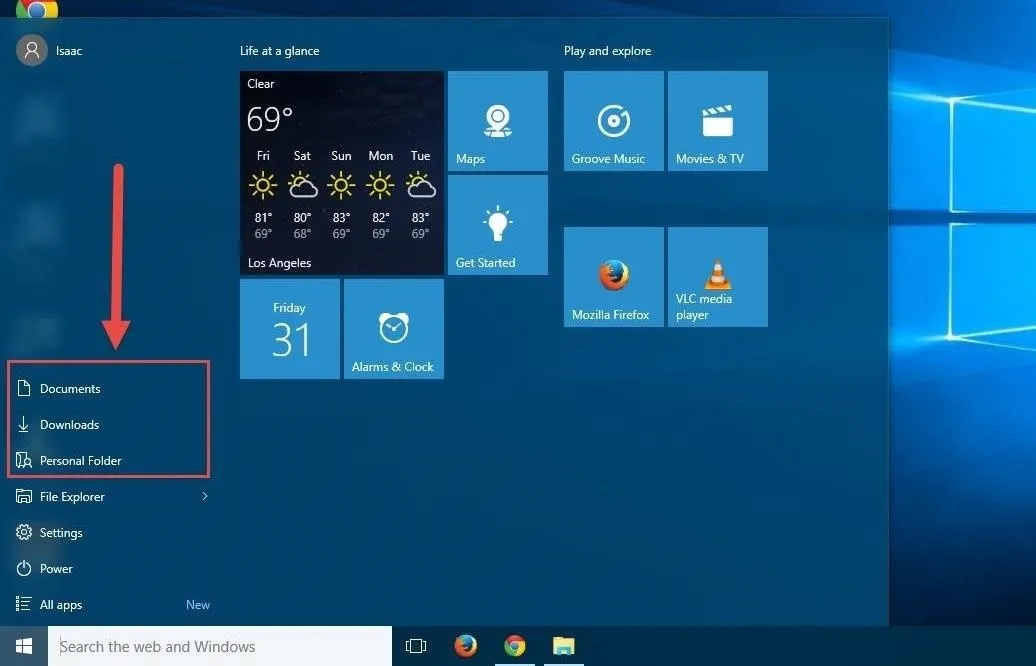
They're back!
Of course if you want to disable folders from showing on the Start menu, simply toggle the ones you want to off.
Connect to Gadget Hacks on Facebook, Google+, or Twitter for more Windows 10 updates.



Comments
Be the first, drop a comment!