Historically, battery life has not been a strong suit for machines running Windows. Poor decisions by hardware manufacturers combined with the resource-hogging behavior of Windows are to blame. However, Microsoft is trying to resolve this issue, once again, with the release of Windows 10.
Since devices have become increasingly more mobile, Microsoft has been changing the behavior of Windows to make it more battery-friendly. Hence, features like adaptive brightness, power plans, and a power troubleshooter, to name just a few, which all help you stay powered longer.
This trend of optimizing the operating system to make better use of battery life continues in Windows 10 with Battery saver, a feature that is found on most mobile devices already. It's definitely a much-needed enhancement, so let's go ahead and take a look at Windows 10's refined power settings.
Accessing the Power Settings
Search for "power settings" in the Start menu, or alternatively, click on the battery icon in the taskbar and choose "Power & sleep settings."
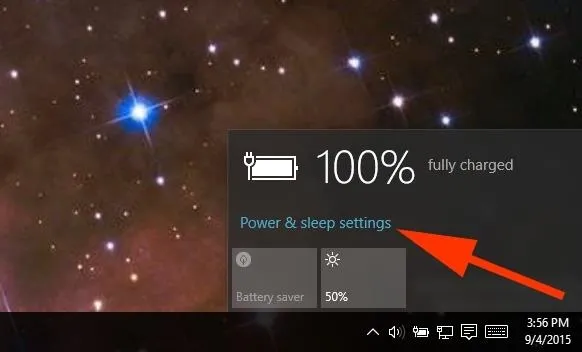
Configuring the Power Settings
Microsoft has moved some of the power options from Control Panel to the Settings app. Here you can set when the screen powers off and when the device goes to sleep. You can configure these settings for when running on battery power and when your PC is plugged in.
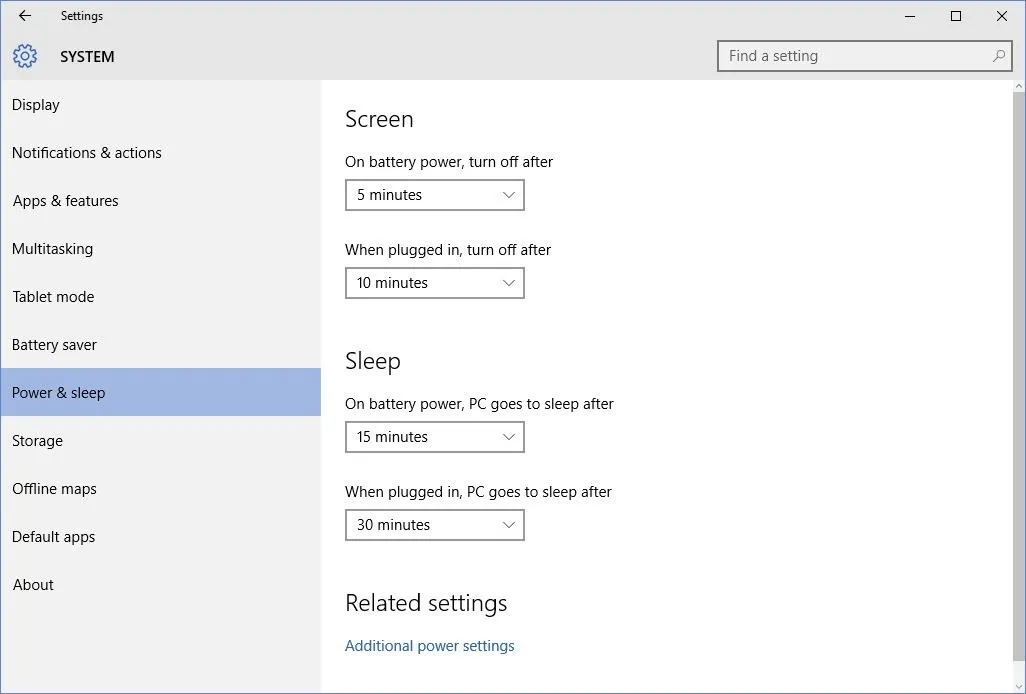
Note that clicking on "Additional power settings" brings up the classic Control Panel section corresponding to power options. Here you have the option to configure some more advanced power options.
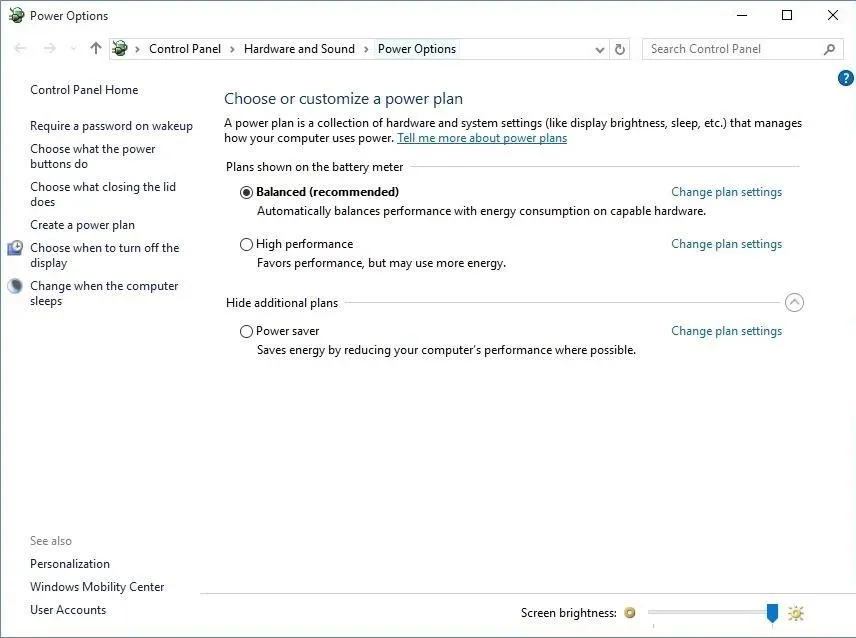
Enabling Battery Saver
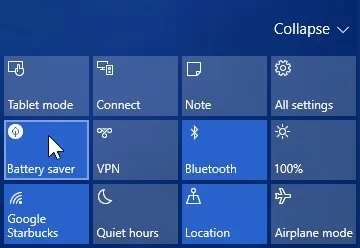
To turn on Battery saver, just click on the battery icon in the taskbar and click on the Battery saver button to enable it (this option will be inactive when your computer is plugged into a power source).
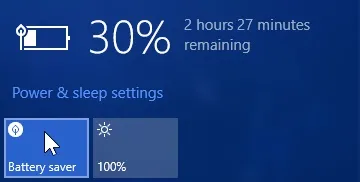
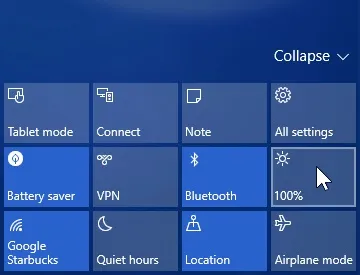
Alternatively, you can enable it from the Action Center by clicking on the Action Center icon on the taskbar and clicking on the Battery saver button to enable it.
Accessing the Battery Saver Settings
To access the Battery saver settings, just search for Battery saver in the Start menu. You can also enable it here, if you wish.
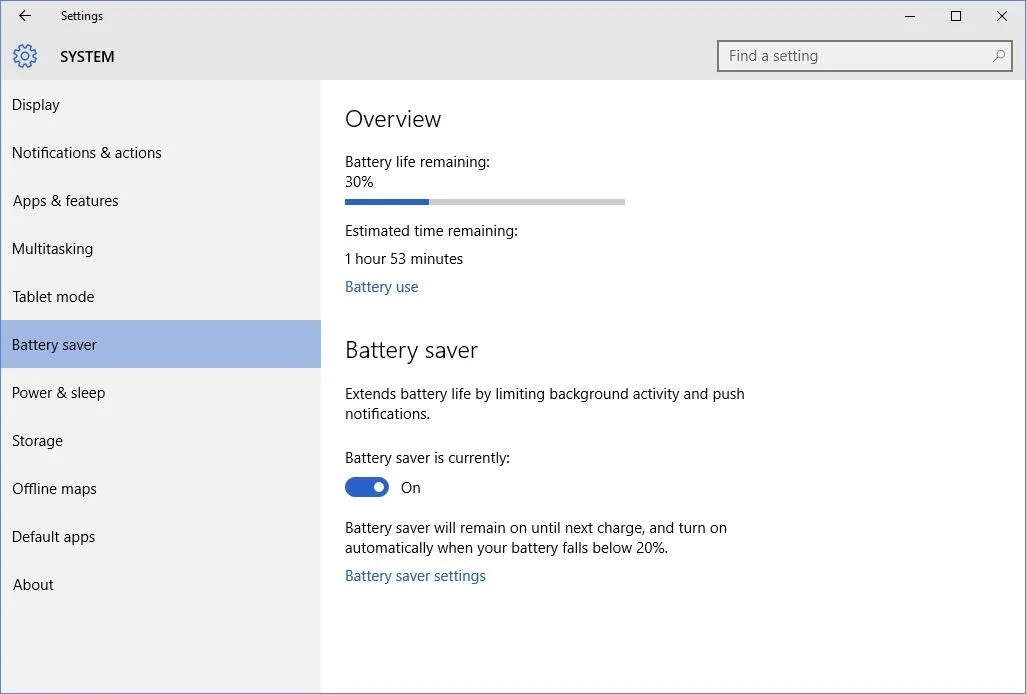
As the name suggests, Battery saver is a feature that will turn on automatically when your device is low on battery and will work to conserve battery life. By default, the critical percentage is 20%, meaning that once your battery hits 20%, Battery saver will turn on automatically.
Viewing Battery Usage
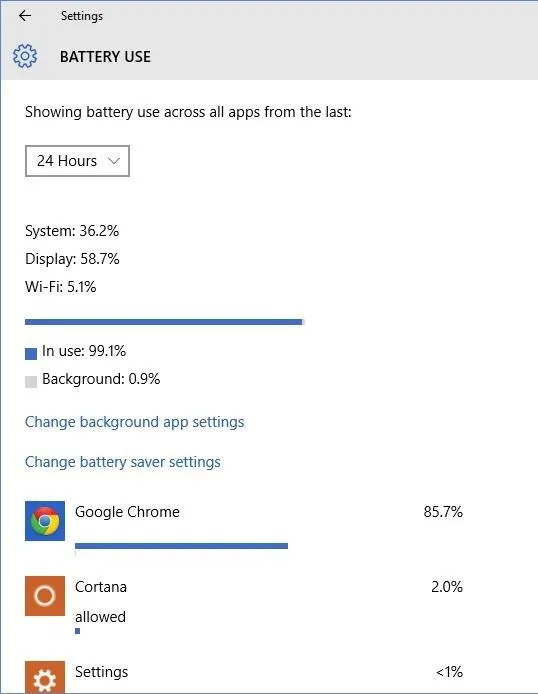
Clicking on Battery use will bring up an overview of historical power consumption per component on your device. You can choose to sort by 24 Hours, 48 Hours, or 1 Week. This is useful for giving you an idea of what is gobbling up the most power.
Managing Background Apps
Apps running in the background can cause quite a bit of strain on the battery. Click on Change background app settings to configure which apps can run in the background.
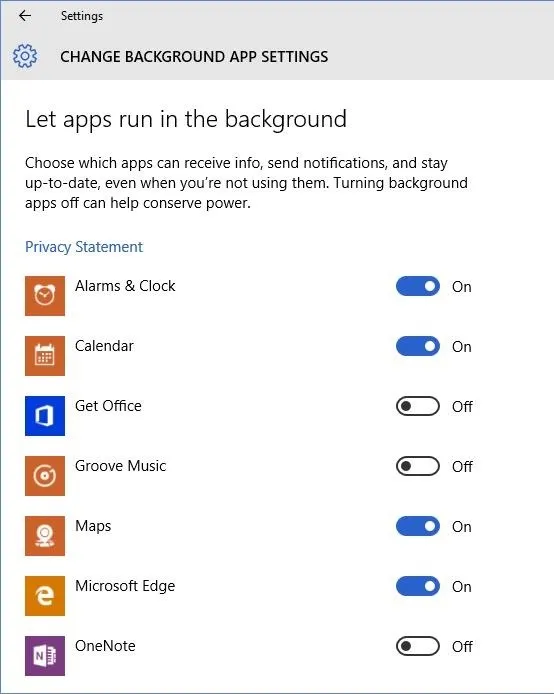
Disable everything that is nonessential, since leaving these apps running in the background will decrease your battery life.
Configuring the Actual Battery Saver Settings
And now to configure the actual Battery saver settings, simply click on Battery saver settings on the main Battery saver page inside the Settings app. Alternatively, clicking on Change battery saver settings while inside the Battery Use page will redirect you once again to the settings for Battery saver itself.
Here, you can enable and customize the critical percentage required for activation of battery saver, ranging all the way from 5% to 100%. You can also configure whether you want to receive push notifications and if screen brightness should be lowered while Battery saver is active.
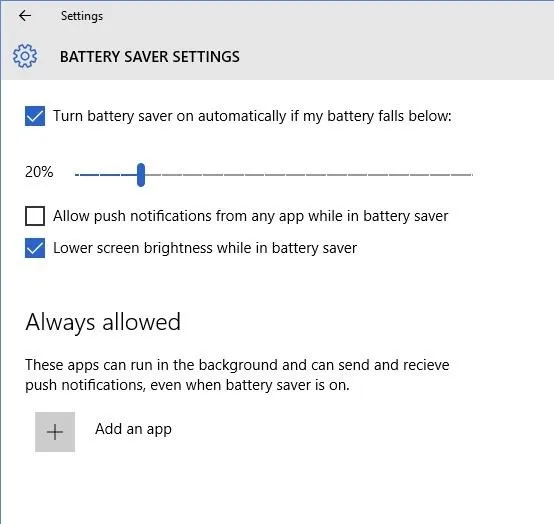
The remaining option is to add apps that are always allowed to run in the background, even when battery saver is enabled. So if you have an app that is absolutely critical for it to always be running, then you should add the app here. Otherwise, leave it blank to help your battery life.
Bonus: Quick Toggles for Adjusting Screen Brightness
Your display is a very power hungry component. There are quick toggles available to adjust your screen brightness, which in turn help to increase battery life.
Just click on the battery icon on the taskbar and you should see a button next to the battery saver button with an icon of the sun and a percentage. Clicking on this button will toggle display brightness by quarter increments from 25% to 100%.
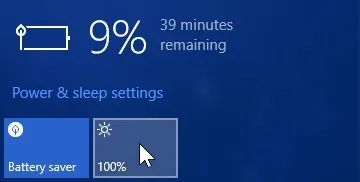
Alternatively, you can access this functionality in the Action Center as well. Just click on the Action Center icon on the taskbar, and you should see the same button present there as well with the same functionality.
Final Thoughts
It's great to see that Microsoft has introduced the Battery saver feature. In my simple tests, I got almost 7 hours of battery life with the Battery saver feature enabled, which is certainly better than previous versions of Windows. Yet, there is still room for improvement.
When compared to its main competitor, Mac OS X, Windows 10 battery life is still lacking (on average). Windows 10 battery life, again on average, is also shorter than on Chromebooks, another sector that Microsoft is competing with.
The world has gone mobile, and battery life is a critical factor. Microsoft has been pushing hard to make Windows a more mobile-friendly OS, starting with Windows 8 and beyond. Microsoft has been working on both collaborating better with hardware manufacturers and making Windows more resource efficient. With more updates inbound both from Microsoft and from device makers, Windows 10 battery life should improve further.
Connect to Gadget Hacks on Facebook, Google+, or Twitter for more Windows 10 updates.
Cover image via Shutterstock


Comments
Be the first, drop a comment!