For reasons unknown, Microsoft decided to change the way the Guest account feature in the new Windows 10 operating system works. In previous versions, the Guest account feature allowed you to set up a limited account for other users so they don't have access to your important documents and settings. Now, the process requires assigning an email to a new account and configuring share settings.
Well, not all hope is lost. In modern versions of Windows, including Windows 10, there is a feature called Assigned Access, otherwise known as Kiosk Mode. Assigned Access configures a user account so that only a single Universal Windows application will run inside that user account. By recreating some of the functionality of the Guest user account, Assigned Access is a pretty valuable feature.
Go to the User Accounts Section Inside the Settings App
First thing you'll need to do is select or create a user account that you want to use for Assigned Access. You can configure an existing account on your PC or you can go ahead and create a new user account.
Go ahead and launch the Settings app and navigate to Accounts, then to the Family & other users section. Alternatively, you can simply search for and launch this section from the Start menu.
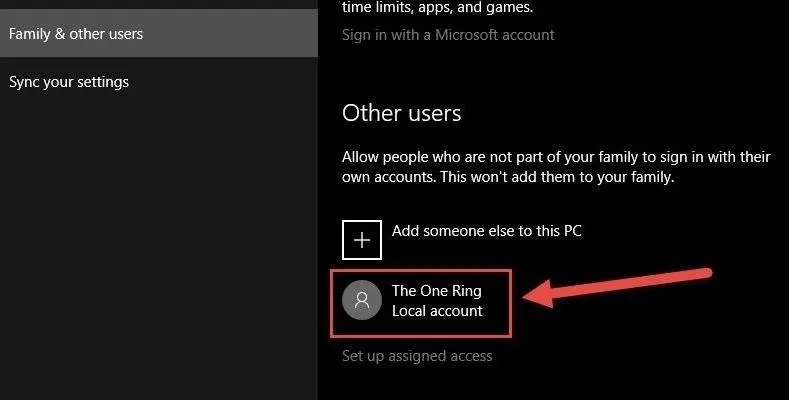
Select User for Assigned Access
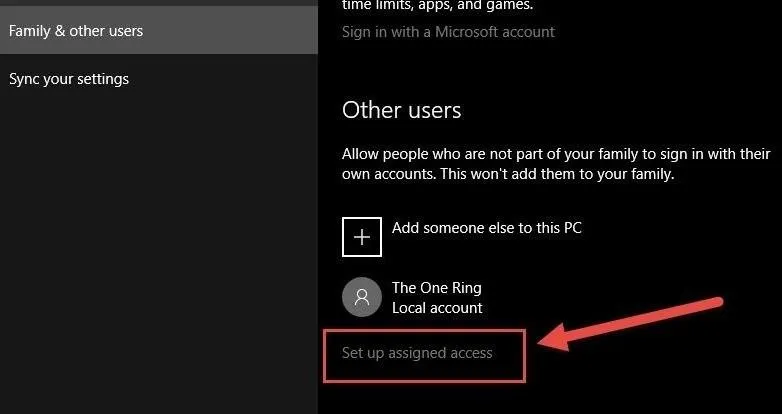
Once you have selected (or created) the user account that you want to use for Assigned Access, it's time to set up which app you want to assign access to. Click on Set up assigned access to begin the process.
Then on the next screen, choose the user account that you want to use for Assigned Access from the list.
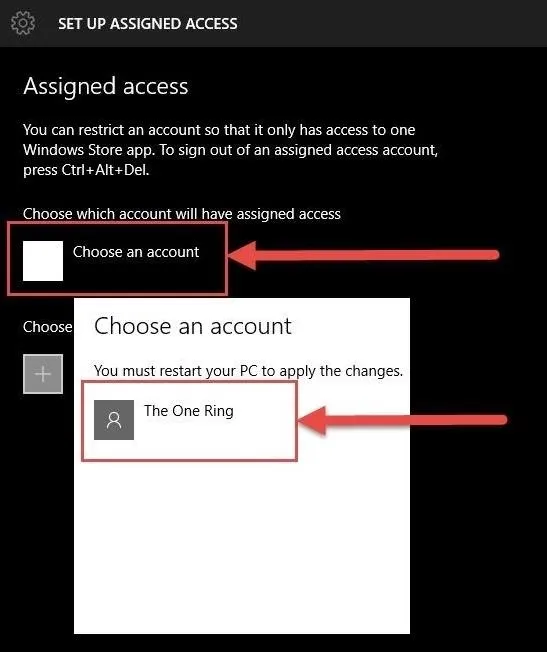
Select App for Assigned Access
Now it's time to choose the app for Assigned Access, but note that if you're using a new user account, you'll need to sign in to that account at least one time to be able to select it.
Apps that ship with Windows 10 can actually be configured for Assigned Access, but if you want to use another, just make sure it's active of the account you'd like to assign it to. Now just choose the app you want from the list—here we are using the stock Weather app.
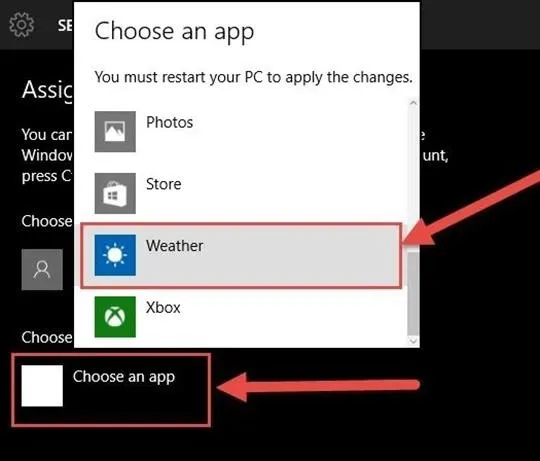
Restart your computer and you should be good to go. From now on, when signing into the user account configured for Assigned Access, you will be able to only use the single app that you selected.
End an Assigned Access Session
To end an existing Assigned Access user session, simply press the familiar Ctrl + Alt + Delete key combination and you'll be signed out of the Assigned Access user session.
Turn Off Assigned Access
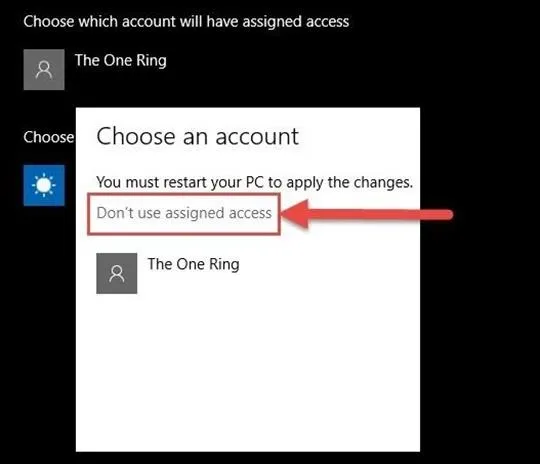
Disabling Assigned Access is pretty easy. Just go back to the user account selection screen when setting up Assigned Access (Step 2) and choose the Don't use assigned access option. Restart and you should be all set.
Note that, as of now, Assigned Access is available only on Windows 10 Professional and Enterprise editions. Though the features of Assigned Access are not as extensive as the Guest user account feature, having the ability to configure a single user account so that it runs only a single Windows app can be quite useful, especially when dealing with children. While the Guest user might make a comeback down the road, Assigned Access is a valuable tool of its own.
Make sure to follow Gadget Hacks over on Facebook, Google+, or Twitter to find out more cool things about Window's latest operating system.













Comments
Be the first, drop a comment!