


How to Reduce CPU Bottlenecks in Windows 11: Built-In Fixes
Who this guide is for
Before diving in, a quick map of which steps apply to you:
| Setting | All users | Gamers | Hybrid-GPU laptops | Heavy downloaders | Creators |
|---|---|---|---|---|---|
| Hardware-Accelerated GPU Scheduling | ✓ | ✓ | ✓ | ✓ | |
| Efficiency Mode | ✓ | ✓ | ✓ | ✓ | ✓ |
| Network Adapter Offloading | ✓ | ✓ | |||
| App Hardware Acceleration + GPU Assignment | ✓ | ✓ | ✓ | ✓ | |
| DirectStorage + Windowed Game Optimizations | ✓ | ✓ |
Work through the first two sections regardless of your setup. Step 3 is worth doing if you transfer large files regularly, stream heavily, or have a fast connection that actually taxes your adapter. The final two parts are conditional: check the requirements and skip anything that doesn't apply to your hardware.
Prerequisites
- Windows 11 installed and fully updated (Settings > Windows Update)
- A dedicated GPU with current drivers if you plan to use Hardware-Accelerated GPU Scheduling; update via Device Manager or your GPU manufacturer's software before proceeding
- An NVMe SSD if you intend to verify DirectStorage; SATA drives are not supported
- Know whether your system has both an integrated GPU and a discrete GPU, as this matters for Steps 4A and 4B; check Device Manager under Display Adapters if you're unsure
A note on conditional availability: Several of these settings do nothing until your hardware and drivers meet the requirements. If a toggle is missing or a setting doesn't appear to help, an outdated GPU driver is the most common cause, not a missing Windows feature.
One limitation to set upfront: these adjustments address CPU overhead caused by Windows routing work inefficiently. They won't solve a genuinely underpowered CPU. If the workload itself exceeds what your processor can handle, better task distribution helps at the margins but won't change the ceiling.
The most common Windows 11 CPU bottleneck isn't really about the CPU running out of capacity. It's about work landing in the wrong place. Graphics management tasks that could run on the GPU are running on the CPU instead. Network packets the adapter could handle itself are getting processed by the CPU. Background processes are consuming scheduler time that should go to whatever you're actually doing in the foreground.
If you're looking to reduce CPU bottlenecks in Windows 11, that distinction matters because the fix isn't buying a faster processor. It's redirecting work to hardware that's already there and already idle. Microsoft's Performance and Diagnostics team found that applying Efficiency Mode to competing background processes improved UI responsiveness by 14% to 76% across tested scenarios, with up to a 4x improvement on CPU-contended systems. Not by making the CPU faster. By making sure the right work reaches it first.
This guide covers five adjustments built into Windows 11 that reduce unnecessary CPU overhead: offloading graphics scheduling to the GPU, giving background processes lower scheduler priority, letting the network adapter handle its own packet processing, keeping application-level hardware acceleration on, and for gamers enabling DirectStorage and modern presentation for windowed titles. The order is deliberate: broadest impact first, hardware-specific and gaming steps toward the end.
Part 1: How to reduce CPU usage in Windows 11 start here regardless of your setup
Step 1: Enable Hardware-Accelerated GPU Scheduling
What it does: By default, Windows uses the CPU to manage portions of GPU memory and schedule graphics workloads. Enabling Hardware-Accelerated GPU Scheduling moves that management onto the GPU itself, which is architecturally better suited to parallel processing tasks. PCWorld notes this reduces CPU load during typical desktop use and multitasking, with the most meaningful gains on modern graphics cards running current drivers.
How to enable it:
- Press Win + I to open Settings.
- Go to System > Display > Graphics.
- Click Default graphics settings (labeled Change default graphics settings on some builds).
- Toggle Hardware-Accelerated GPU Scheduling to On.
- Restart your PC. The setting takes effect only after reboot.
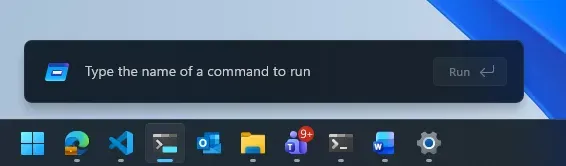
How to tell it worked: Open Task Manager (Ctrl + Shift + Esc) and watch the CPU graph during normal desktop use or multitasking. You're looking for a modest, consistent reduction, not a dramatic drop.
Expected payoff: Desktop responsiveness, multitasking, rendering-heavy workflows.
Compatibility note: On older GPUs or stale drivers, the gain may be negligible. PCWorld notes the benefit is most pronounced on modern graphics cards with current drivers installed. If the setting causes any instability, toggle it back off and update your GPU drivers before retrying.
Step 2: Apply Efficiency Mode to heavy background processes
What it does: Some CPU pressure isn't about total load. It's about background processes grabbing CPU time at the exact moment you need it. Windows 11's Efficiency Mode addresses this by dropping a process's base priority to low and assigning it Microsoft's EcoQoS quality-of-service tier. According to Microsoft's Performance and Diagnostics team, EcoQoS signals the scheduler to run the process in the most power-efficient manner, which can mean running the processor at a lower frequency, while low priority ensures it yields to whatever's running in the foreground.
The measured result: up to a 4x improvement in UI responsiveness on CPU-contended systems, with gains ranging from 14% to 76% across common scenarios. That's the responsiveness you actually feel when switching windows or typing while something heavy runs in the background.
How to apply Efficiency Mode:
- Press Ctrl + Shift + Esc to open Task Manager.
- Click the Processes tab and click the CPU column header to sort by consumption.
- Identify background processes with consistently high CPU usage. Common candidates include update agents, sync services, and background indexers.
- Right-click the target process and select Efficiency mode.
- Confirm when prompted. A leaf icon will appear in the Status column.
How to tell it worked: The process's CPU usage should drop or become less spiky, and foreground applications should feel more fluid. Watch Task Manager for 30 to 60 seconds of typical use after applying the setting.
Gotcha: If Efficiency mode is greyed out, Windows is protecting that process as a core system component. Microsoft explicitly warns that throttling these processes can affect system stability. Skip them. Also note: Efficiency Mode applied manually through Task Manager does not persist across reboots. Apps that natively implement EcoQoS maintain it automatically without manual intervention.
Step 3: Enable network offloading on your adapter
What it does: Modern network adapters can handle checksum verification, large packet segmentation, and receive-side packet distribution internally, without involving the CPU. When these features are disabled, every packet the adapter receives gets handed to the CPU for processing instead. PCWorld reports that many adapters support this, and the CPU load difference can be measurable during sustained downloads, streaming, or large file transfers on fast connections.
How to enable network offloading:
- Press Win + X and select Device Manager.
- Expand Network Adapters, right-click your active adapter, and choose Properties.
- Click the Advanced tab.
- Look for these entries: Checksum Offload (may include IPv4, IPv6, TCP, and UDP variants), Large Send Offload v2, and Receive Side Scaling.
- For each entry, open the dropdown and set it to Enabled.
- Click OK to apply. No restart required.
How to tell it worked: Start a large file download and watch CPU usage in Task Manager. CPU involvement during network activity should be lower and less spiky than before.
Gotcha: Not every adapter exposes all three options. Work with what's available. If any individual setting causes connection issues after enabling, disable that specific entry and leave the others enabled.
Part 2: Application-level settings Windows 11 performance settings for CPU-intensive apps
Steps 4A and 4B both push work toward the GPU, but at different levels. Step 4A is about individual apps using their own hardware acceleration toggles. Step 4B is about making sure the right GPU handles that work in the first place. That second layer only matters on systems with both an integrated and a discrete GPU, but it's a common and easily missed source of unnecessary CPU involvement on hybrid-GPU laptops.
Step 4A: Verify hardware acceleration is enabled in your key apps
What it does: Browsers, video editors, and media applications have their own hardware acceleration toggles. When enabled, they hand off decoding, effects rendering, and compositing to the GPU. When disabled, which sometimes happens after troubleshooting that never gets reversed, all of that work falls back to the CPU. PCWorld notes the impact is greatest on systems handling many tasks in parallel: multiple browser tabs, active renders, media playback.
Where to find it:
- Chrome: Settings > System > toggle Use graphics acceleration when available
- Edge: Settings > System and performance > toggle Use graphics acceleration when available
- Creative/video apps (Premiere, DaVinci Resolve, Handbrake, etc.): Preferences > Hardware Acceleration or Performance; the exact label varies by application
- Restart each app after enabling the setting to ensure decoding, effects, or rendering are reliably offloaded to the GPU
How to tell it worked: CPU usage during video playback or export should drop noticeably. In browsers, heavy pages with animations or video embeds should feel lighter.
Step 4B: Assign the right GPU to demanding apps (hybrid-GPU systems)
What it does: On systems with both an integrated GPU and a discrete GPU, most modern laptops and some desktops, Windows may not automatically route demanding applications to the more capable hardware. PCWorld explains this can cause Windows to route tasks through the integrated graphics unit and involve the CPU unnecessarily. Setting a per-app GPU preference tells Windows which hardware to use from the start.
How to assign a GPU preference per app:
- Press Win + I and go to System > Display > Graphics.
- Find your target app in the list. Click Browse to add it if it's not listed.
- Click Options next to the app.
- Set GPU preference to High performance.
- Click Save.
How to tell it worked: CPU usage during that application's most demanding tasks, rendering, export, gaming, should decrease as the discrete GPU handles more of the workload directly.
Expected payoff: Hybrid-GPU laptops, creative work, gaming on hardware with both an integrated and discrete GPU.
Part 3: Gaming-specific optimizations (optional)
Skip this section if you don't play games on this system.
Step 5A: Check DirectStorage availability for games on NVMe
What it does: Standard game asset loading routes data through the CPU: from SSD to RAM, CPU decompresses, then to GPU. DirectStorage reduces that overhead by enabling data to transfer more directly from an NVMe SSD to the graphics card, with requirements that include Windows 11, compatible NVMe storage, and a supported GPU with current drivers. PCWorld is clear on what to expect: the practical payoff is shorter load times and fewer I/O-related stutters, not higher average frame rates. Set expectations accordingly before enabling it.
Critically, the game itself must also support DirectStorage. If it doesn't, the feature has no effect for that title regardless of your hardware.
How to check DirectStorage availability:
- Launch a DirectStorage-compatible game.
- Press Win + G to open Xbox Game Bar.
- Look under the gaming features panel. PCWorld notes you can check basic availability there.
If DirectStorage isn't showing as available, the most likely cause is an outdated GPU driver or the specific game lacking support.
How to tell it helped: Load screen duration and in-game asset streaming stutters are the metrics to watch, not frame rate averages.
Step 5B: Enable optimizations for windowed games (DX10/DX11 titles)
What it does: Older DX10 and DX11 games running in windowed or borderless-windowed mode use a legacy presentation model that adds latency. The "Optimizations for windowed games" setting upgrades these titles to the modern flip-model presentation that DX12 games already use. According to Microsoft's DirectX Developer Blog, flip model generally results in lower display latency, meaning frames reach the screen faster. DX12 games are unaffected since they already run the modern path.
How to enable it:
- Press Win + I and go to System > Display > Graphics.
- Click Default graphics settings.
- Toggle Optimizations for windowed games to On.
- Restart the game.
How to tell it helped: Input lag and frametimes are the metrics here, not average FPS. If you have a frametime monitoring tool such as CapFrameX or the Xbox Game Bar's performance overlay, look for more consistent frame delivery rather than higher peaks.
Gotcha: This setting applies only to DX10/DX11 games running in windowed or borderless-windowed mode. For games running in exclusive fullscreen, Microsoft notes a similar optimization already exists, so this toggle adds nothing there. If the global setting causes issues with a specific title, per-game overrides are available: open that app's entry under System > Display > Graphics and check the box to opt out of windowed game optimizations for that title.
What to check if CPU usage stays elevated
After working through the applicable steps, your system is routing graphics management through the GPU, giving background processes lower scheduler priority, letting the network adapter handle its own processing, and sending demanding applications to the right hardware. For gamers, asset loading reduces CPU involvement where the game and hardware support it, and older titles in windowed mode get a lower-latency presentation path.
To measure the cumulative effect, compare CPU usage in Task Manager against your typical workloads before and after. For gaming, frametime graphs show stutter reduction more clearly than average FPS. CapFrameX and the Xbox Game Bar performance overlay both work well for this. For network offloading, watch CPU percentage during a sustained large download.
If usage remains elevated after all of this, the remaining culprits are worth checking in roughly this order: startup apps consuming resources before you notice them (Task Manager > Startup apps), browser extensions and pinned tabs running heavy background scripts, driver issues flagged in Device Manager, and a malware scan to rule out something running uninvited. It's also worth stepping back and asking whether the CPU is actually the constraint at all. If the GPU is fully saturated, no amount of CPU tuning moves the needle.
When none of those explain the load, you've likely hit a genuine hardware ceiling. That's a useful answer too: it tells you what a hardware upgrade would actually solve, rather than guessing.


Comments
Be the first, drop a comment!